

You can preserve a wedding bouquet at home for under $50 in silica gel, but only if you start within 24 to 48 hours of the reception.
Wait longer and bacteria moves into the stems, making color and shape much harder to keep. The same urgency applies to air drying and pressing, though those methods need two to four weeks and leave petals muted and papery.
1. Prep the Bouquet First
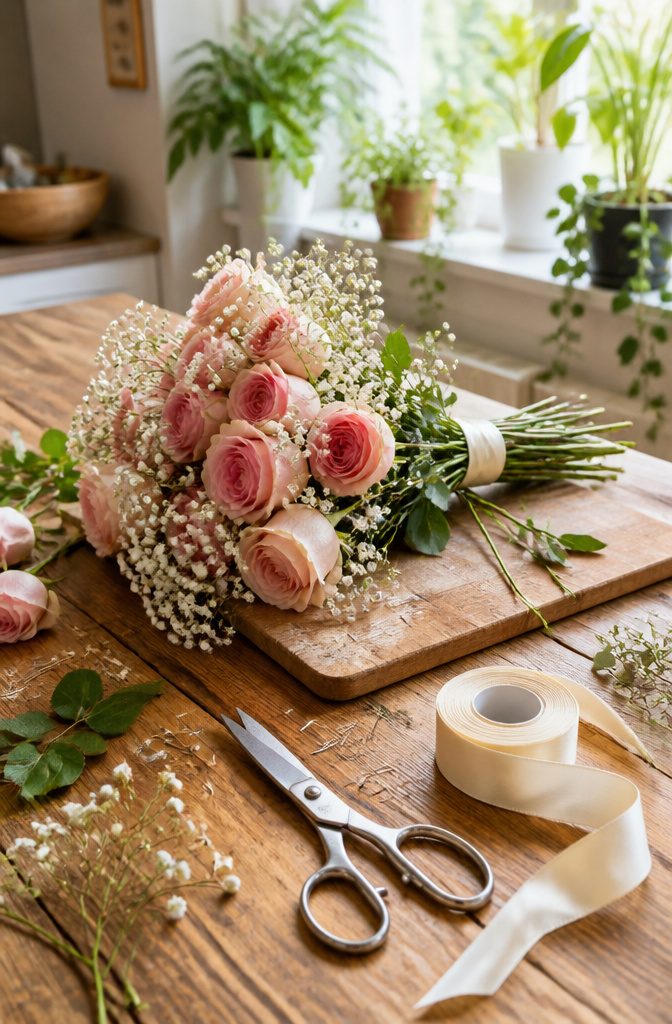
Ribbon and pins hold a bouquet together, but they trap moisture against stems and block airflow once drying starts.
I pull those off first, then cut the stems to whatever length the method demands. Air drying needs 6–8 inches left for hanging; pressing calls for 1–2 inches at most, and some blooms press better with no stem at all.
Silica gel sits in the middle, about 4–5 inches, enough to grip without burying the flower head in excess material.
Bruised petals and browned leaves go next.
If the bouquet is dense, smaller bundles dry more evenly than the whole clutch held tight. Start this within 24–48 hours after the wedding, while color and shape are still holding.
Water buys a little freshness at first, but after that first day it speeds rot; cloudiness or odor in the vase means bacteria has already moved into the stems, and preservation gets much harder from there.
If you want the original arrangement back later, snap photos from a few angles before you pull anything apart. Those shots save you from guessing how the florist layered everything when it comes time to rebuild.

【COMPLETE FLOWER DRYING KIT – READY TO USE】Includes 2.5 lbs silica gel crystals, an airtight drying container, a soft cleaning brush, protective gloves, a dust mask, and a step-by-step instruction guide. Everything you need to start drying and preserving flowers at home without additional tools. The container helps keep crystals contained during drying, while the brush allows you to gently remove crystals without damaging delicate petals

[ <1mm Ultra-Fine Crystals for Flawless Petal Detail ] Unlike bulky 3–5mm beads, Fonday’s ultra-fine silica gel gently surrounds each flower to keep its natural 3D shape without crushing or marking—perfect for wedding bouquets, roses, and delicate blooms.

[ <1mm Ultra-Fine Crystals for Flawless Petal Detail ] Unlike bulky 3–5mm beads, Fonday’s ultra-fine silica gel gently surrounds each flower to keep its natural 3D shape without crushing or marking—perfect for wedding bouquets, roses, and delicate blooms.
2. Pick a Preservation Method
The method you choose depends on what your bouquet is made of and how you want it to look years from now.
Hardy blooms like roses, lavender, and statice handle almost anything. They keep their shape through air drying and hold onto color better than you’d expect.
Delicate flowers like peonies and ranunculus are another story. Air drying leaves them wrinkled and dropping petals, so silica gel is the safer bet for soft, layered blooms.
Air drying gives that classic muted, vintage look and costs next to nothing. Silica gel runs a few dollars at craft stores and preserves three-dimensional shape and brighter color in just days.
Individual daisies finish in 2–3 days; thicker roses need closer to a week. Pressing flattens everything into framed art, which works for single stems or petals but not a dense bouquet.
Resin encases dried flowers in clear plastic, shaped into blocks or trays, though you still need to dry the flowers first and the resin work itself takes real skill.
Professional freeze drying keeps up to 95% of the original appearance, with colors and textures that read as nearly fresh.
The catch is the price, typically $150–$400, and a 2–4 week turnaround. For brides who spent heavily on the bouquet and want it preserved as it looked walking down the aisle, that investment makes sense.
For others, silica gel or even careful air drying delivers a keepsake that still carries the memory, just in a different visual register.

All in One Kit: Package includes high-quality 5lbs silica gel flower drying, an airtight container, a brush, and a user manual. The flower drying silica is stored in double sealed bags for long-term preservation and protection, ensuring the product arrives in the best condition

【COMPLETE FLOWER DRYING KIT– READY TO USE】Includes 5 lbs of silica gel (2 x 2.5 lb bags), an airtight container, a soft cleaning brush, gloves, a dust mask, and a step-by-step instruction guide; Everything needed to dry and preserve flowers at home without additional tools; The brush helps gently remove crystals without damaging delicate petals

【10lbs Flower Drying Silica Gel】Stored in an air-tight sealed container for long-term preservation and protection; The handle makes it easy to carry and pour. Preserving your wedding bouquet can be a way to extend the beauty and value of your flowers, and create a lifelong memento. Try using our silica gel sands to preserve your favorite blooms
3. Air Dry Upside Down
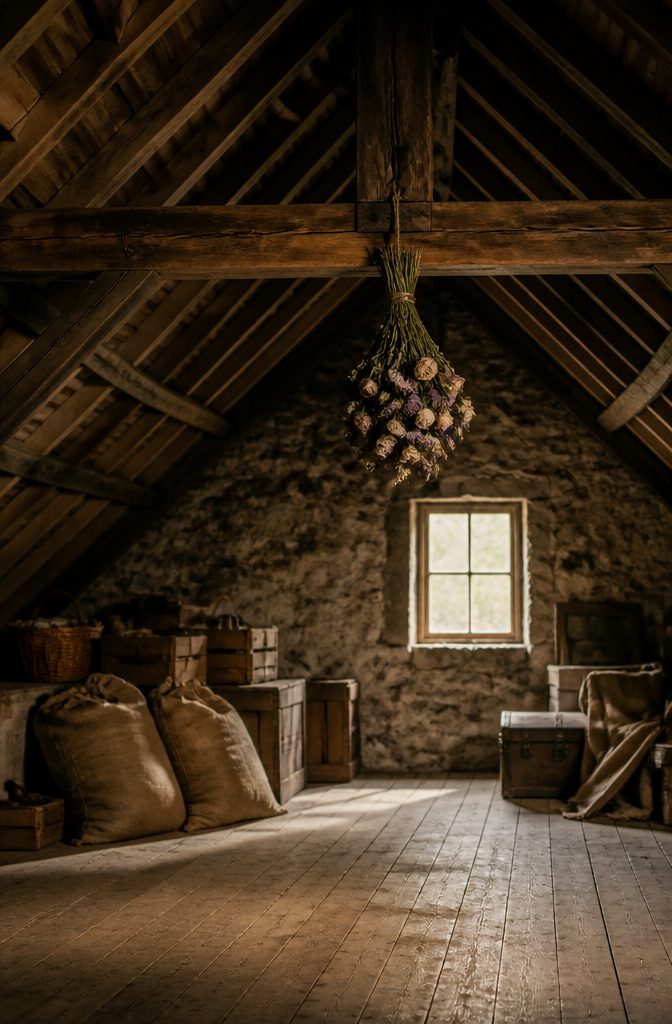
- Strip the lower leaves so nothing sits below the tie point and traps moisture against the stems.
- Bundle the stems snug with a rubber band, tight enough that nothing shifts but not so tight it crushes.
- Hang the bouquet upside down in a dark, dry spot with steady airflow. An attic, closet, or spare room works if sunlight never hits it directly.
- Wait 2 to 4 weeks until the petals feel dry and papery to the touch.
Colors will mute, no way around that. Roses, baby’s breath, and lavender handle the shift better than most, settling into tones that suit farmhouse or bohemian frames.
The trade is the cost: string, a hook, and time. No silica, no resin, no professional fee.

【10 Layers Extra Large Size Flower Press】: With an 11 x 11 inches large size, this flower press kit is perfect for preserving wedding bouquets, springtime blooms, herbs and leaves. Create stunning dried floral arrangements for wedding centerpieces, romantic keepsakes, or springtime and Easter crafts—all in one press!

Orders are despatched from our UK warehouse next working day.

【11" x 11" 10 Layers Large Flower Press Kit for Bulk Crafting】: Caydo 11x11 inch large flower press with 10 layers is designed for efficiency and creativity. This wooden flower press allows you to batch-press an array of flowers and plants at once, making it ideal for large-scale projects. Whether you’re creating framed pressed flower art, delicate bookmarks, resin jewelry, or intricate pressed flowers for crafts, this flower pressing kit works seamlessly for all these projects. Save time and increase your output with this high-capacity flower press kit.
4. Press Between Heavy Books
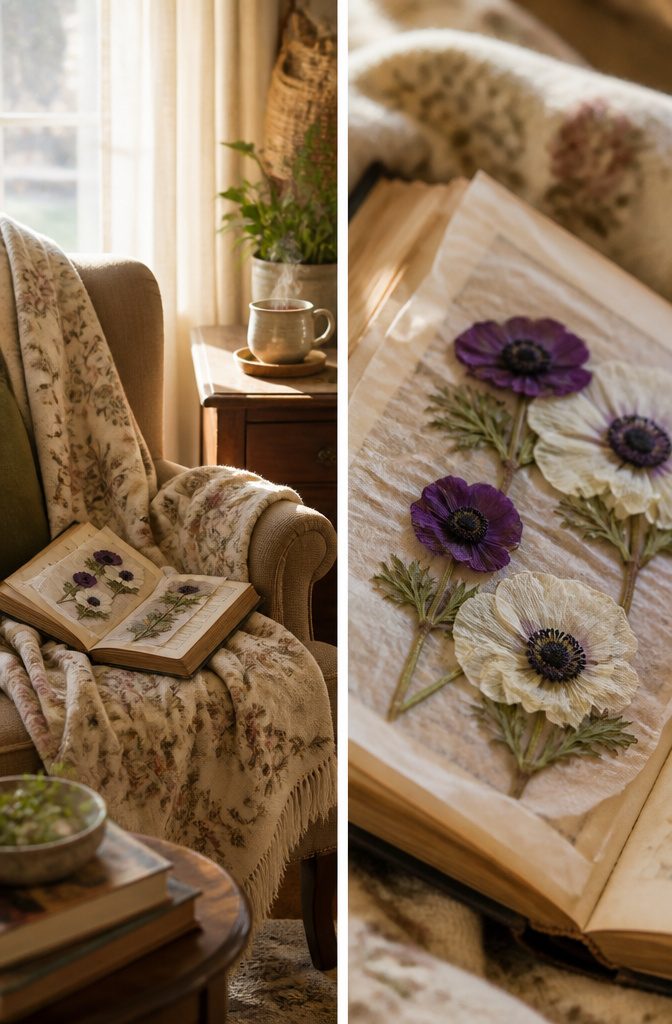
A heavy book from your own shelf is the cheapest press you already own.
Tear a few blooms from the bouquet, lay them flat between sheets of parchment paper or blotting paper (regular printer paper tends to stick), and slip the stack inside.
A phone directory works too, if you still have one. Stack more weight on top: another book, a box, anything that keeps pressure even across the whole page.
Two to four weeks is the wait.
The flowers dry paper-thin, color holding better than air-drying if you move fast after the wedding. What you get is flat, framed art, not the rounded shape of the bouquet itself.
Smaller blooms like lisianthus or anemones press whole; thick roses need to come apart into single petals. Some brides split the bouquet and press enough pieces for small frames to hand out to parents or the wedding party.

All in One Epoxy Resin Kit: Dive into resin art with our complete kit featuring 4 versatile silicone molds, 16oz of premium epoxy resin, a dazzling 12-color glitter set, 12 real dried flowers, and essential tools like measuring cups, wooden sticks, gloves, and droppers. Perfectly tailored for beginners, ensuring a seamless start to your resin art journey.

Complete Starter Kit with Accessories: Everything you need in one box! Includes 10 plastic cups, 4 mixing sticks, 2 droppers, and 2 pairs of gloves – no extra tools required. Perfect for beginners and pros alike, designed to streamline your resin projects from start to finish

【1:1 Ratio By Volume & Self leveling】Mixing is simple with a 1:1 ratio of resin to hardener,and self leveling save a lot of time,beginners as well as experienced artists can achieve satisfactory results with this easy-to-use and self leveling resin epoxy.
5. Bury in Silica Gel
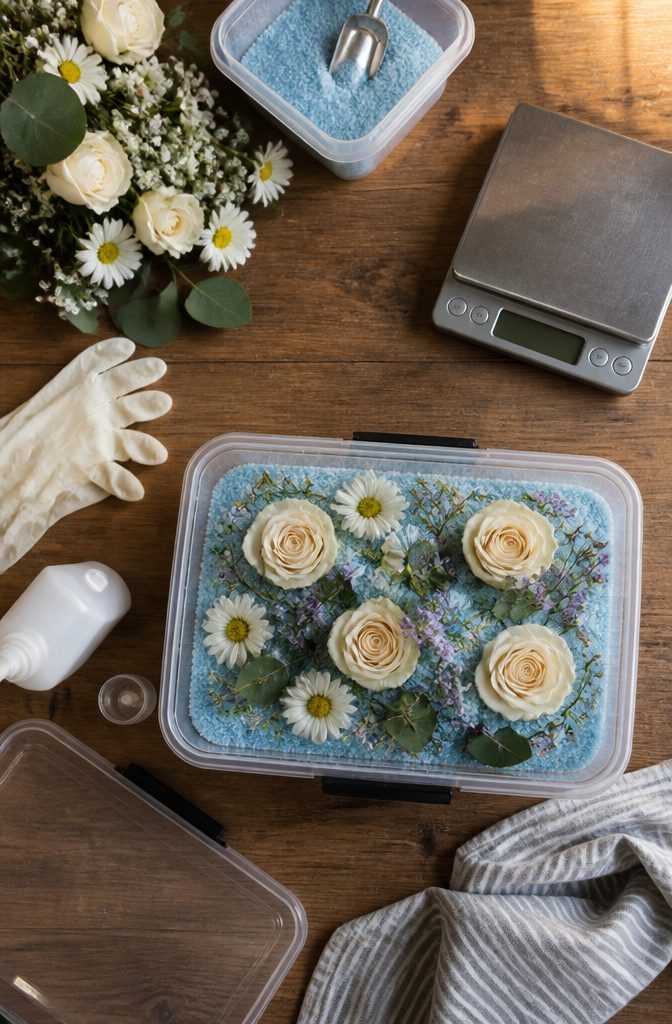
Silica gel pulls moisture out fast while holding the flower’s shape and color far better than hanging ever could. The trade is cost: about $29.99 for 5 lb or $46.99 for 8 lb, and a full bouquet project needs roughly 10 lb total.
- Find an airtight container with enough room for the blooms to sit without crowding. A one-inch base layer of silica gel goes in first.
- Set each flower face-up, then slowly pour more gel around and between petals until every bloom is completely buried. Any exposed spot traps moisture and rots.
- Seal the container and do not open it. Checking daily lets humidity back in and stalls the process.
- Wait two to seven days depending on the flower. Delicate blooms like daisies dry in two to three days; thicker roses need the full week. The gel itself changes color as it absorbs water, giving you a visual cue.
- Lift the dried flowers out slowly. Dry petals snap if handled fast. Brush off remaining crystals with a soft paintbrush.
Wear gloves or a mask while working with silica gel, and never reuse that container for food.
The gel can be reactivated later by heating it in a low oven to drive out absorbed moisture, so one batch serves multiple projects.

Ready-to-Use Natural Confetti – No Cleanup Needed!Perfect for outdoor weddings! Unlike plastic petals, our real white rose petals + dried eucalyptus leaves blend seamlessly into grass and vanish naturally. Ideal for flower girl toss, aisle decor, or DIY wedding crafts (resin coasters, candle embeds).

500+ Freeze Dried Petals, 4.57oz (130g) – Each pack includes 500+ freeze dried white rose petals, approx. 4.57oz (130g), giving you plenty of rose petals for wedding aisle runners, table scatter and centerpiece decorations

Noble White Rose Petals: Each pack includes approx 2.1 oz (60g) of petals, with an average size of 1.5–2 inches, with approximately 200 pieces. The natural white flower petals vary in shape, adding authenticity and elegance to your wedding, party, or romantic decorations.
6. Cast in Resin
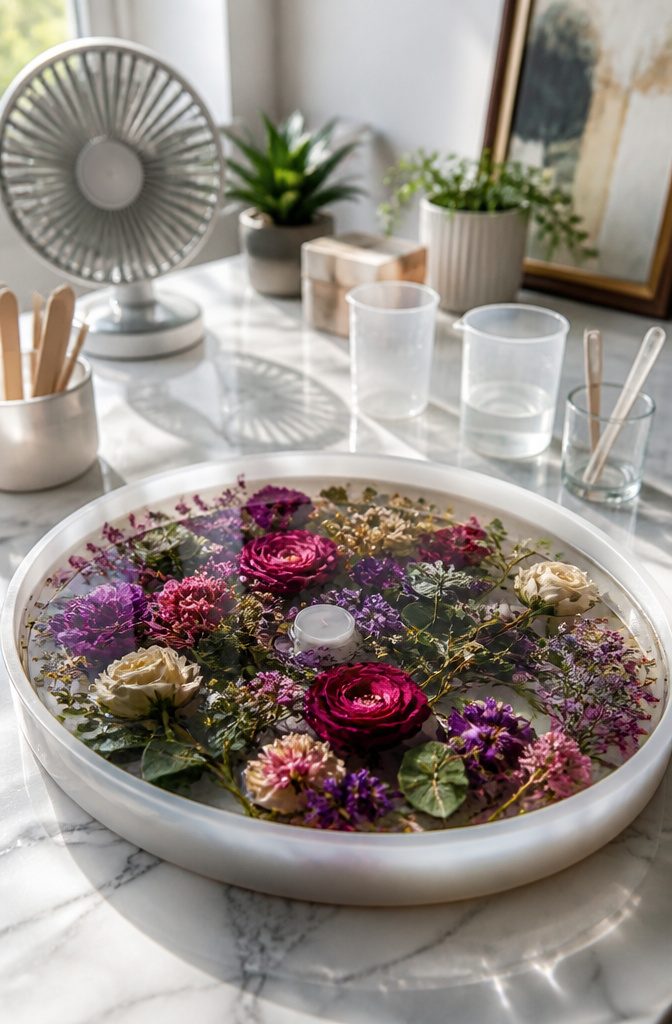
Resin turns dried flowers into something you can actually use: a coaster that sits on the coffee table, a paperweight on your desk, a pendant you wear.
The catch is that every step before the pour matters more than the pour itself.
- Dry the flowers completely first. Air drying works, or bury them in silica gel until every petal feels like paper, not petals. Any moisture left inside will rot later, sealed under glass-clear plastic.
- Arrange the dried blooms in your mold. A shallow silicone coaster mold keeps things simple; deeper blocks need layering. Place the flowers face-down or sideways, whatever view you want frozen, because once the resin hits them they are fixed.
- Mix epoxy resin per the manufacturer’s ratio, slowly. Pour a thin base layer, set the flowers, then fill to the top. Pour too fast and air bubbles form around the petals, tiny spheres you will not pop later. A toothpick helps nudge flowers back into place before the gel stage.
- Let it harden 24 to 48 hours. Larger pieces, like bookends or deep paperweights, need longer, sometimes one to three weeks for a full cure.
The learning curve is real. Bubbles, misaligned stems, or resin that cures cloudy will ruin the piece and the flowers inside it.
Ventilation and gloves are non-negotiable; the fumes are harsh. If your bouquet cost half the flower budget, commissioning a resin specialist may save both the flowers and your sanity.

【Non-toxic Indicating Silica Gel for Flower Drying】: Flower drying silica gel consists of a blend of 5% small orange indicating crystals and 95% white silica gel crystals. Indicating crystals are free from cobalt chloride and will change color to dark green once they become saturated with moisture, serving as a visual indicator of the absorbed moisture level. The fine and small crystals are ideal for effectively reaching and drying each flower petal while preserving their precise shape.
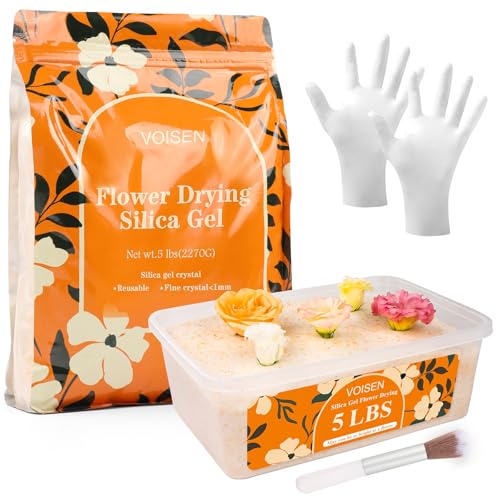
FAST DRYING --- The silica gel flower drying is not only a newly developed highly efficient hygroscopic silica gel material, but also less pressure on flowers, maintaining the original shape and color of flowers at the same time can quickly and thoroughly remove the water in flowers and plant materials. It takes 2-5 days to dry the flowers.

10LBS FLOWER DRYING SILICA GEL: Stored in an air-tight sealed container for long-term preservation and protection; The handle makes it easy to carry and pour. Our silica gel flower drying crystals kit will save you valuable time.
7. Hire a Professional
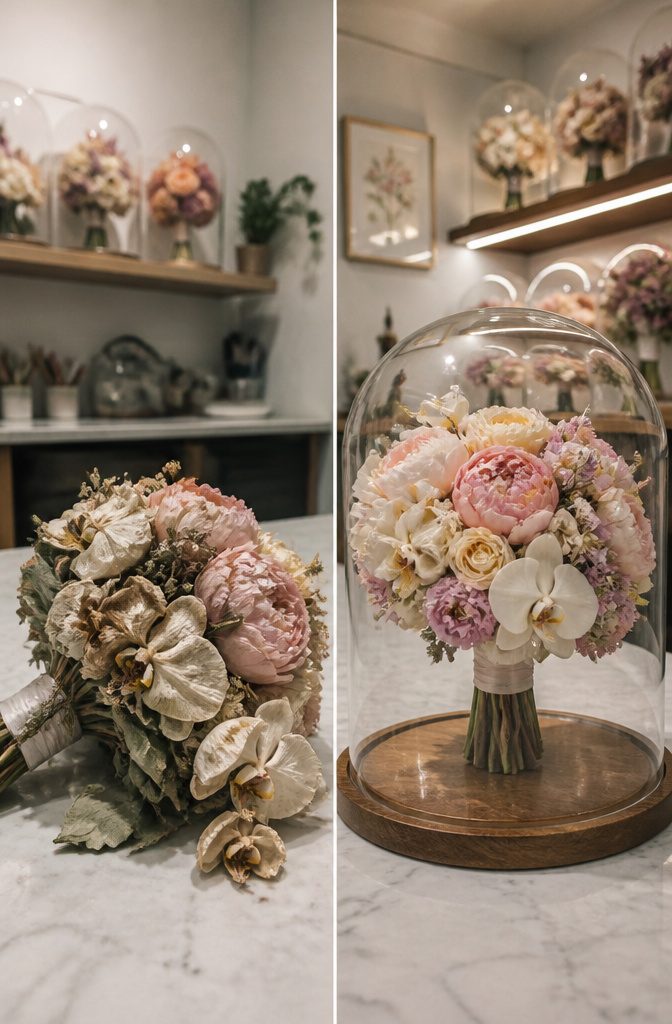
Professional freeze-drying keeps up to 95% of a bouquet’s original color and shape, which is why it dominates for complex arrangements with mixed varieties like orchids, peonies, or garden roses.
The process runs flowers through extreme cold and vacuum pressure to pull moisture without collapsing the cellular structure, then typically adds a UV-protective spray against later fading. Turnaround is 2–4 weeks, and the price lands between $150 and $400.
Resin casting sits at the same professional tier, encasing blooms in clear polymer for shadow-box or block displays that need no maintenance from you.
Both methods make sense when the bouquet itself is too elaborate to risk on home techniques, or when you want a finished piece you simply hang rather than handle yourself.
The cost stings against a tight budget.
For me, reading through the service breakdowns, the value call rests on whether your arrangement includes delicate or rare flowers that flatten badly, and whether you trust your own patience for silica-gel timing or resin mixing.
Handing it off removes that gamble entirely.

Product package includes: YOU WILL GET 2 pieces Bride Flower Bouquet Holder wedding flower foam bouquet holder (with out flowers), 50 pieces clear plastic crystal bits pins; for floral arranging, wedding corsages, bouquets, dressmaker or any art designing and crafting.

【Fine Silica Gel for Flower Drying】: Specially crafted with a fine consistency, our silica gel absorbs moisture without harming flowers, altering their colors, or changing their form. The granules, finely textured and reminiscent of playground sand, exhibit superior moisture absorption compared to standard silica gel. Flower drying silica gel consists of a blend of 5% orange indicating silica gel and 95% white silica gel.

One-Step Filter Basket Separation: No more tedious digging through silica gel to retrieve your blooms, this flower drying silica box features a built-in filter basket that instantly separates dried flowers from silica gel crystals when lifted. No messy spills, no damaged delicate petals from clumsy handling, just well preserved flowers with little effort
What the Methods Cost and How Long They Take
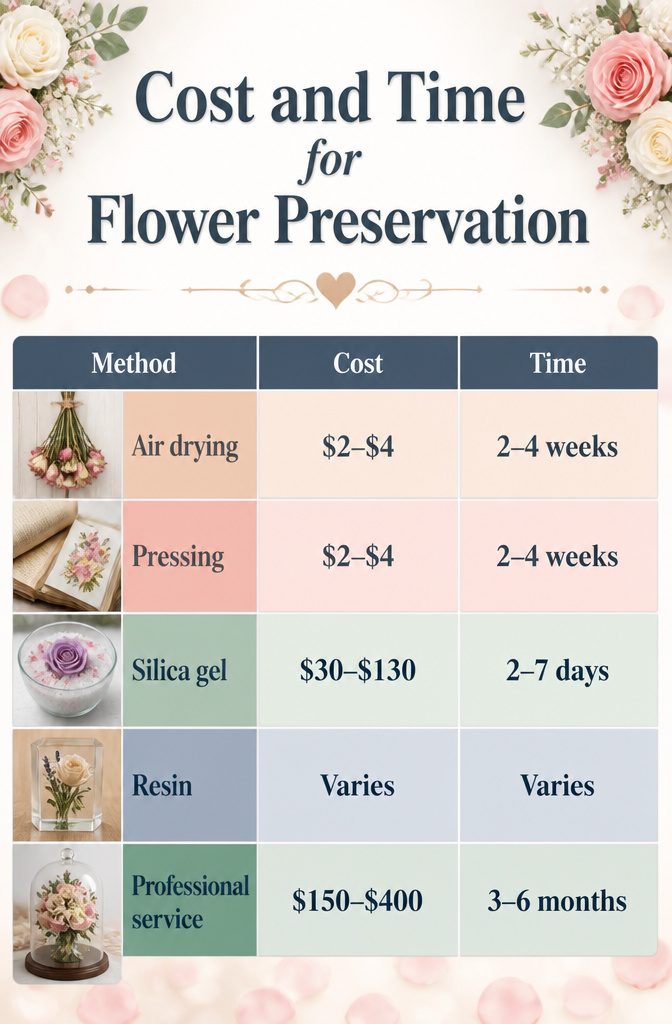
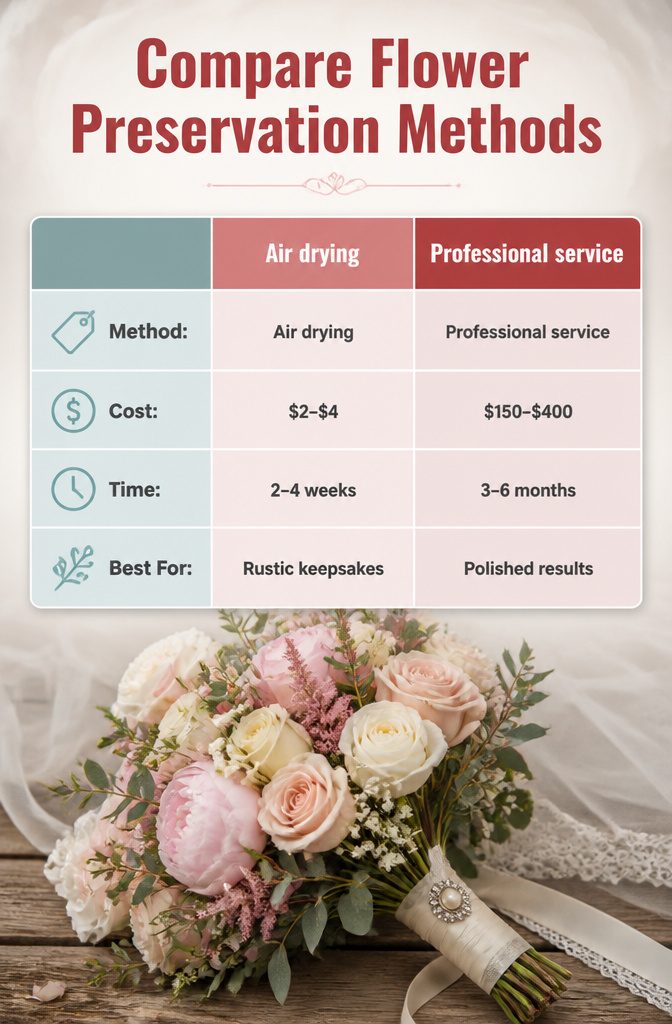
Air drying and pressing cost next to nothing, just the price of some twine or a heavy book, but both methods demand 2 to 4 weeks before the flowers are fully set.
Silica gel runs about $30 to $50 in materials and finishes in under a week, though one bride I read about spent closer to $130 when her bouquet turned out larger than expected and she had to make an emergency supply run.
Resin casting adds the cost of resin, molds, and whatever you ruined while learning the technique.
Professional preservation services range from $150 to $400 and take the longest, typically 3 to 6 months, but they also handle the risk so you do not have to.
| Method | Cost | Time | Best For |
|---|---|---|---|
| Air drying | $2–$4 | 2–4 weeks | Rustic, muted keepsakes |
| Pressing | $2–$4 | 2–4 weeks | Flat, frame-ready art |
| Silica gel | $30–$130 | 2–7 days | Bright color, true shape |
| Resin | Supply costs + practice | Varies | Custom display pieces |
| Professional service | $150–$400 | 3–6 months | Polished, worry-free results |
If your bouquet is simple and your timeline is loose, the free methods win.
If you are leaving for a honeymoon in ten days and need this decision made before you go, silica gel or a professional are the only realistic plays.

【Extra Large 5 Layers Flower Press Kit】: This heavy-duty flower press kit features a 17 x 11.8-inch workspace and 0.47-inch thick wood panels with a stable pressure system for even distribution. It perfectly locks flowers' natural shapes and textures. The 5-layer design allows instant processing of high volumes, easily pressing garden roses, peonies, or full wedding bouquets – making it ideal for large botanical displays or bulk-drying materials for craft projects.
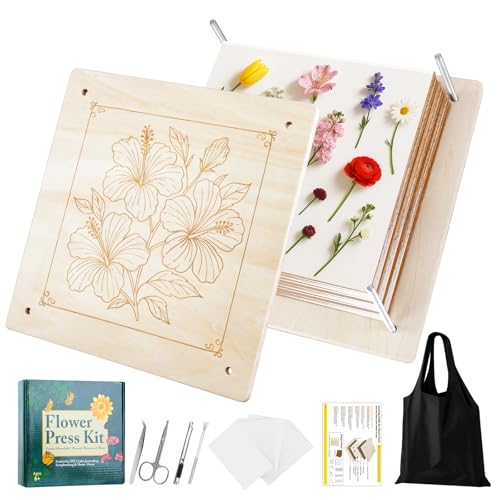
【Extra Large 10 Layer Design】11x11 inch size with 10 layers allows you to press more flowers at once. Perfect for large blooms and plant preservation.

Which Flowers Hold Up Best
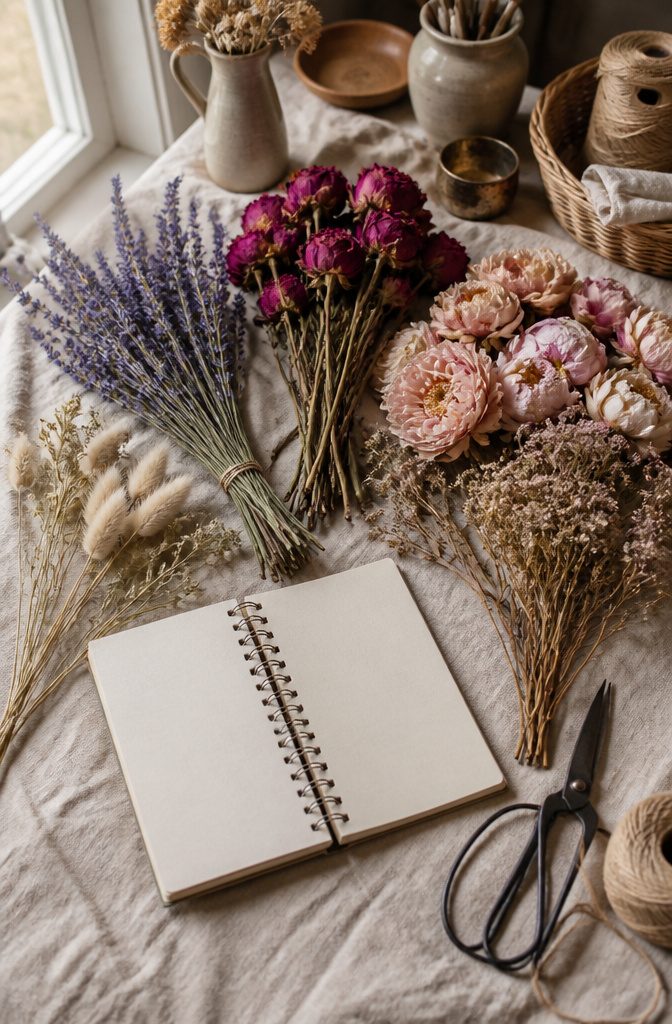
Roses and lavender hold their shape through almost any drying method you choose.
Roses keep a good amount of their original color, and lavender looks nearly identical once it is dry. These are the blooms to prioritize if your time or supplies are limited.
Peonies and hydrangeas are a different story.
Their petals are delicate and moisture-heavy, so air drying often leaves them brown, shrunken, or even moldy. Silica gel is the safer bet for these, pulling moisture out fast enough to protect their form.
The gel works in 2–3 days for thin blooms like daisies and up to a week for thicker roses, and you can reuse it after heating out the absorbed moisture in a low oven.
Filler stems like eucalyptus and baby’s breath add texture and are worth saving alongside your focal flowers. If your 2026 bouquet already includes dried elements like pampas grass or wheat, those skip the preservation step entirely.
Factor your specific mix into the method you pick; a bouquet heavy on hardy blooms can air dry with little risk, while one packed with peonies needs the faster, more controlled route.

Crystal Clear Resin and Hardener: With a 1:1 volume mixing ratio, our epoxy resin is simple to use, even for beginners and hobbyists. This resin kits Includes 32oz crystal clear resin+32oz epoxy hardener

【RESIN STARTER KIT】This resin epoxy kit contains 32oz epoxy resin, 7 silicone mold kits, 12 colors of sequins, 12 colors of cellophane, 12 dried flowers, 2 colors of gold foil paper, and other resin tools that come with detailed instructions, such as measuring cups, rods, gloves, and plastic droppers.

4 Boxes Flowers - The dired flower features 48 styles in different styles & variety color small flowers, red, pink, blue, purple, green, orange and so on, enough to satisfy your craft decoration and creative needs.
Ways to Display the Finished Piece
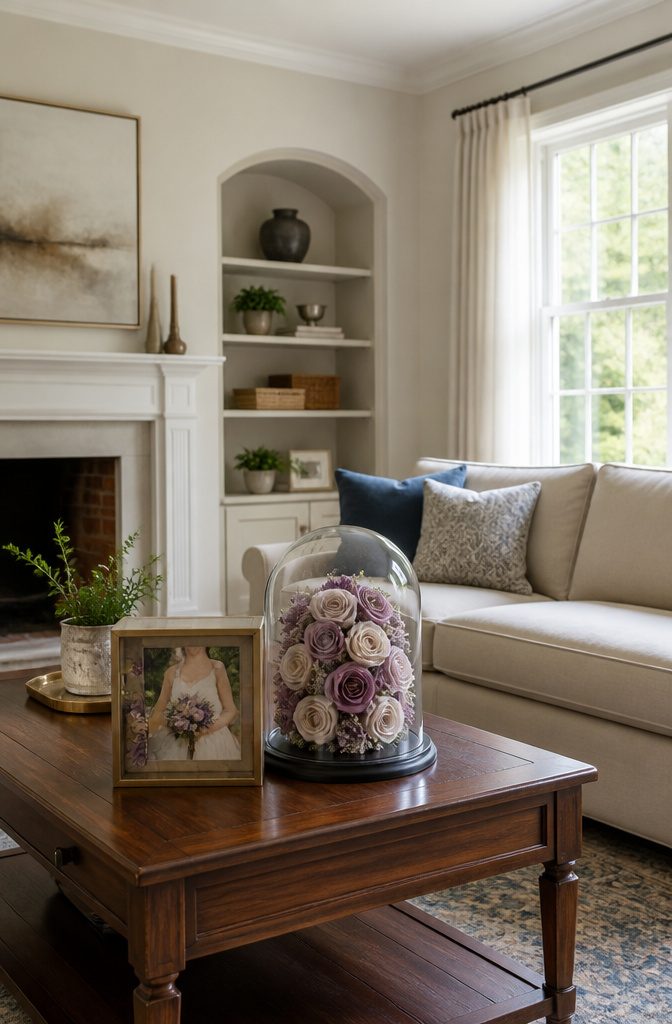
The display you choose should match how you preserved the flowers in the first place. Pressed blooms work best in floating frames or slim shadow boxes, where the flattened petals read as art rather than leftovers.
A full dried bouquet needs the depth of a shadow box or the sculptural enclosure of a glass dome; the dome keeps dust off and gives the arrangement a still-life quality that works on a shelf or bedside table.
Resin blocks stand alone as paperweights or shelf pieces, the flowers suspended inside with a glass-like finish that catches light.
I have seen dried stems paired with a wedding invitation or a small photo inside one box, and the combination turns a single keepsake into a story of the day.
Place whatever you choose away from bright windows, bathrooms, and vents; heat and moisture still fade color and weaken petals long after the preservation work is done.

📦 1000+ Freeze Dried Petals, 7.76oz (220g) – Each pack includes 1000+ freeze dried white rose petals, approx. 7.76oz (220g), giving you plenty of rose petals for wedding aisle runners, table scatter and centerpiece decorations

Elegant Ivory: The petals are about 1.5*1.5 inches in diameter and weigh about 3.17 oz, with approximately 300 pieces. The natural petals come in various sizes and shapes. Like many white flowers, white roses symbolize peace, innocence, purity, loyalty, and eternity, making them perfect for proposals, anniversaries, or romantic nights

Real Natural Rose Petals: Our petals have been screened layer by layer, using high-quality, plump, real rose flowers petal as raw materials, and are treated by glycerin soaking to freeze the petals at the most beautiful moment
DIY or Professional: How to Decide
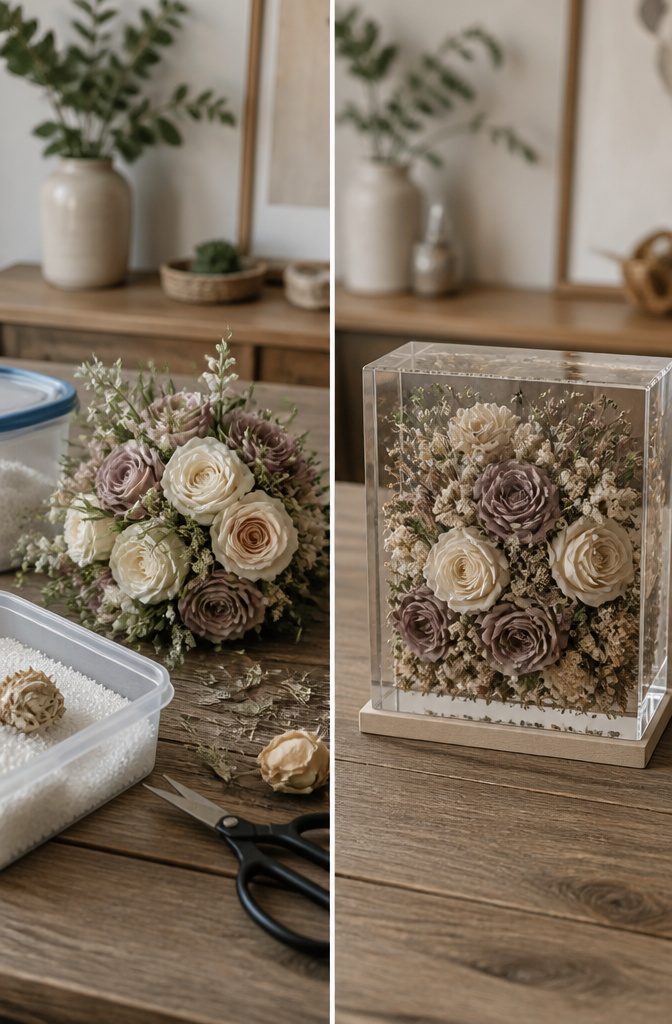
The choice between drying your own bouquet and handing it off starts with an honest look at what you are holding. A compact clutch of garden roses and a few sprigs of eucalyptus is one thing.
A cascading arrangement with orchids, peonies, and trailing greenery is another. The second one will punish every shortcut in your kitchen.
DIY suits brides with time in the first week of marriage and a tolerance for some color shift.
Silica gel buried in an airtight container can pull moisture from individual blooms in two to seven days, and you can reuse the gel by heating it dry again.
The results are brighter than hanging, but they are still home results. Some wrinkling and fading are part of the deal.
Professional preservation makes sense when the bouquet is elaborate, the flowers are delicate, or you want a guaranteed result without spending your honeymoon learning technique.
Freeze drying, the method most pros use, rapidly freezes flowers at extremely low temperatures and pulls moisture out under vacuum pressure.
The process takes two to four weeks and costs $150 to $400, but it retains up to 95 percent of the original appearance. Resin casting, another pro option, suspends blooms in clear blocks or trays for display.
The budget spread is wide enough that either path can fit. A $100 to $300 service fee sits against the cost of silica gel and a container, plus the risk of ruining flowers you already spent money on.
Sentimental urgency matters here. If the idea of opening a failed DIY box in three weeks makes you anxious, that anxiety is worth pricing in.
Frequently Asked Questions
How long does it take to preserve a bridal bouquet at home?
Most DIY methods take between 2 and 4 weeks for flowers to fully dry. Air drying and pressing both fall in that range, while silica gel speeds things up to 2–7 days depending on the flower thickness.
The critical prep work, like stripping leaves and starting before bacteria sets in, happens in the first 24–48 hours after the wedding.
Can all flowers in a bridal bouquet be preserved?
Not all flowers preserve equally well.
Hardy blooms like roses, lavender, and statice hold their shape and color through almost any method. Delicate flowers like peonies and ranunculus lose form or brown with air drying; silica gel or professional freeze drying protects them better.
How much does professional bridal bouquet preservation cost?
Professional freeze drying typically runs $150 to $400, with a 2–4 week turnaround.
Resin casting by a specialist sits in the same price tier. The investment makes most sense for elaborate bouquets with mixed or delicate varieties, or when you want a guaranteed result without handling the process yourself.